Wednesday, August 14, 2013

Some SecureRandom Thoughts


The Android security team has been investigating the root cause of the compromise of a bitcoin transaction that led to the update of multiple Bitcoin applications on August 11.


We have now determined that applications which use the Java Cryptography Architecture (JCA) for key generation, signing, or random number generation may not receive cryptographically strong values on Android devices due to improper initialization of the underlying PRNG. Applications that directly invoke the system-provided OpenSSL PRNG without explicit initialization on Android are also affected. Applications that establish TLS/SSL connections using the HttpClient and java.net classes are not affected as those classes do seed the OpenSSL PRNG with values from /dev/urandom.


Developers who use JCA for key generation, signing or random number generation should update their applications to explicitly initialize the PRNG with entropy from /dev/urandom or /dev/random. A suggested implementation is provided at the end of this blog post. Also, developers should evaluate whether to regenerate cryptographic keys or other random values previously generated using JCA APIs such as SecureRandom, KeyGenerator, KeyPairGenerator, KeyAgreement, and Signature.


In addition to this developer recommendation, Android has developed patches that ensure that Android�s OpenSSL PRNG is initialized correctly. Those patches have been provided to OHA partners.


We would like to thank Soo Hyeon Kim, Daewan Han of ETRI and Dong Hoon Lee of Korea University who notified Google about the improper initialization of OpenSSL PRNG.


Update: the original code sample below crashed on a small fraction of Android devices due to /dev/urandom not being writable. We have now updated the code sample to handle this case gracefully.


/*
* This software is provided 'as-is', without any express or implied
* warranty. In no event will Google be held liable for any damages
* arising from the use of this software.
*
* Permission is granted to anyone to use this software for any purpose,
* including commercial applications, and to alter it and redistribute it
* freely, as long as the origin is not misrepresented.
*/

import android.os.Build;
import android.os.Process;
import android.util.Log;

import java.io.ByteArrayOutputStream;
import java.io.DataInputStream;
import java.io.DataOutputStream;
import java.io.File;
import java.io.FileInputStream;
import java.io.FileOutputStream;
import java.io.IOException;
import java.io.OutputStream;
import java.io.UnsupportedEncodingException;
import java.security.NoSuchAlgorithmException;
import java.security.Provider;
import java.security.SecureRandom;
import java.security.SecureRandomSpi;
import java.security.Security;

/**
* Fixes for the output of the default PRNG having low entropy.
*
* The fixes need to be applied via {@link #apply()} before any use of Java
* Cryptography Architecture primitives. A good place to invoke them is in the
* application's {@code onCreate}.
*/
public final class PRNGFixes {

private static final int VERSION_CODE_JELLY_BEAN = 16;
private static final int VERSION_CODE_JELLY_BEAN_MR2 = 18;
private static final byte[] BUILD_FINGERPRINT_AND_DEVICE_SERIAL =
getBuildFingerprintAndDeviceSerial();

/** Hidden constructor to prevent instantiation. */
private PRNGFixes() {}

/**
* Applies all fixes.
*
* @throws SecurityException if a fix is needed but could not be applied.
*/
public static void apply() {
applyOpenSSLFix();
installLinuxPRNGSecureRandom();
}

/**
* Applies the fix for OpenSSL PRNG having low entropy. Does nothing if the
* fix is not needed.
*
* @throws SecurityException if the fix is needed but could not be applied.
*/
private static void applyOpenSSLFix() throws SecurityException {
if ((Build.VERSION.SDK_INT < VERSION_CODE_JELLY_BEAN)
|| (Build.VERSION.SDK_INT > VERSION_CODE_JELLY_BEAN_MR2)) {
// No need to apply the fix
return;
}

try {
// Mix in the device- and invocation-specific seed.
Class.forName("org.apache.harmony.xnet.provider.jsse.NativeCrypto")
.getMethod("RAND_seed", byte[].class)
.invoke(null, generateSeed());

// Mix output of Linux PRNG into OpenSSL's PRNG
int bytesRead = (Integer) Class.forName(
"org.apache.harmony.xnet.provider.jsse.NativeCrypto")
.getMethod("RAND_load_file", String.class, long.class)
.invoke(null, "/dev/urandom", 1024);
if (bytesRead != 1024) {
throw new IOException(
"Unexpected number of bytes read from Linux PRNG: "
+ bytesRead);
}
} catch (Exception e) {
throw new SecurityException("Failed to seed OpenSSL PRNG", e);
}
}

/**
* Installs a Linux PRNG-backed {@code SecureRandom} implementation as the
* default. Does nothing if the implementation is already the default or if
* there is not need to install the implementation.
*
* @throws SecurityException if the fix is needed but could not be applied.
*/
private static void installLinuxPRNGSecureRandom()
throws SecurityException {
if (Build.VERSION.SDK_INT > VERSION_CODE_JELLY_BEAN_MR2) {
// No need to apply the fix
return;
}

// Install a Linux PRNG-based SecureRandom implementation as the
// default, if not yet installed.
Provider[] secureRandomProviders =
Security.getProviders("SecureRandom.SHA1PRNG");
if ((secureRandomProviders == null)
|| (secureRandomProviders.length < 1)
|| (!LinuxPRNGSecureRandomProvider.class.equals(
secureRandomProviders[0].getClass()))) {
Security.insertProviderAt(new LinuxPRNGSecureRandomProvider(), 1);
}

// Assert that new SecureRandom() and
// SecureRandom.getInstance("SHA1PRNG") return a SecureRandom backed
// by the Linux PRNG-based SecureRandom implementation.
SecureRandom rng1 = new SecureRandom();
if (!LinuxPRNGSecureRandomProvider.class.equals(
rng1.getProvider().getClass())) {
throw new SecurityException(
"new SecureRandom() backed by wrong Provider: "
+ rng1.getProvider().getClass());
}

SecureRandom rng2;
try {
rng2 = SecureRandom.getInstance("SHA1PRNG");
} catch (NoSuchAlgorithmException e) {
throw new SecurityException("SHA1PRNG not available", e);
}
if (!LinuxPRNGSecureRandomProvider.class.equals(
rng2.getProvider().getClass())) {
throw new SecurityException(
"SecureRandom.getInstance(\"SHA1PRNG\") backed by wrong"
+ " Provider: " + rng2.getProvider().getClass());
}
}

/**
* {@code Provider} of {@code SecureRandom} engines which pass through
* all requests to the Linux PRNG.
*/
private static class LinuxPRNGSecureRandomProvider extends Provider {

public LinuxPRNGSecureRandomProvider() {
super("LinuxPRNG",
1.0,
"A Linux-specific random number provider that uses"
+ " /dev/urandom");
// Although /dev/urandom is not a SHA-1 PRNG, some apps
// explicitly request a SHA1PRNG SecureRandom and we thus need to
// prevent them from getting the default implementation whose output
// may have low entropy.
put("SecureRandom.SHA1PRNG", LinuxPRNGSecureRandom.class.getName());
put("SecureRandom.SHA1PRNG ImplementedIn", "Software");
}
}

/**
* {@link SecureRandomSpi} which passes all requests to the Linux PRNG
* ({@code /dev/urandom}).
*/
public static class LinuxPRNGSecureRandom extends SecureRandomSpi {

/*
* IMPLEMENTATION NOTE: Requests to generate bytes and to mix in a seed
* are passed through to the Linux PRNG (/dev/urandom). Instances of
* this class seed themselves by mixing in the current time, PID, UID,
* build fingerprint, and hardware serial number (where available) into
* Linux PRNG.
*
* Concurrency: Read requests to the underlying Linux PRNG are
* serialized (on sLock) to ensure that multiple threads do not get
* duplicated PRNG output.
*/

private static final File URANDOM_FILE = new File("/dev/urandom");

private static final Object sLock = new Object();

/**
* Input stream for reading from Linux PRNG or {@code null} if not yet
* opened.
*
* @GuardedBy("sLock")
*/
private static DataInputStream sUrandomIn;

/**
* Output stream for writing to Linux PRNG or {@code null} if not yet
* opened.
*
* @GuardedBy("sLock")
*/
private static OutputStream sUrandomOut;

/**
* Whether this engine instance has been seeded. This is needed because
* each instance needs to seed itself if the client does not explicitly
* seed it.
*/
private boolean mSeeded;

@Override
protected void engineSetSeed(byte[] bytes) {
try {
OutputStream out;
synchronized (sLock) {
out = getUrandomOutputStream();
}
out.write(bytes);
out.flush();
} catch (IOException e) {
// On a small fraction of devices /dev/urandom is not writable.
// Log and ignore.
Log.w(PRNGFixes.class.getSimpleName(),
"Failed to mix seed into " + URANDOM_FILE);
} finally {
mSeeded = true;
}
}

@Override
protected void engineNextBytes(byte[] bytes) {
if (!mSeeded) {
// Mix in the device- and invocation-specific seed.
engineSetSeed(generateSeed());
}

try {
DataInputStream in;
synchronized (sLock) {
in = getUrandomInputStream();
}
synchronized (in) {
in.readFully(bytes);
}
} catch (IOException e) {
throw new SecurityException(
"Failed to read from " + URANDOM_FILE, e);
}
}

@Override
protected byte[] engineGenerateSeed(int size) {
byte[] seed = new byte[size];
engineNextBytes(seed);
return seed;
}

private DataInputStream getUrandomInputStream() {
synchronized (sLock) {
if (sUrandomIn == null) {
// NOTE: Consider inserting a BufferedInputStream between
// DataInputStream and FileInputStream if you need higher
// PRNG output performance and can live with future PRNG
// output being pulled into this process prematurely.
try {
sUrandomIn = new DataInputStream(
new FileInputStream(URANDOM_FILE));
} catch (IOException e) {
throw new SecurityException("Failed to open "
+ URANDOM_FILE + " for reading", e);
}
}
return sUrandomIn;
}
}

private OutputStream getUrandomOutputStream() throws IOException {
synchronized (sLock) {
if (sUrandomOut == null) {
sUrandomOut = new FileOutputStream(URANDOM_FILE);
}
return sUrandomOut;
}
}
}

/**
* Generates a device- and invocation-specific seed to be mixed into the
* Linux PRNG.
*/
private static byte[] generateSeed() {
try {
ByteArrayOutputStream seedBuffer = new ByteArrayOutputStream();
DataOutputStream seedBufferOut =
new DataOutputStream(seedBuffer);
seedBufferOut.writeLong(System.currentTimeMillis());
seedBufferOut.writeLong(System.nanoTime());
seedBufferOut.writeInt(Process.myPid());
seedBufferOut.writeInt(Process.myUid());
seedBufferOut.write(BUILD_FINGERPRINT_AND_DEVICE_SERIAL);
seedBufferOut.close();
return seedBuffer.toByteArray();
} catch (IOException e) {
throw new SecurityException("Failed to generate seed", e);
}
}

/**
* Gets the hardware serial number of this device.
*
* @return serial number or {@code null} if not available.
*/
private static String getDeviceSerialNumber() {
// We're using the Reflection API because Build.SERIAL is only available
// since API Level 9 (Gingerbread, Android 2.3).
try {
return (String) Build.class.getField("SERIAL").get(null);
} catch (Exception ignored) {
return null;
}
}

private static byte[] getBuildFingerprintAndDeviceSerial() {
StringBuilder result = new StringBuilder();
String fingerprint = Build.FINGERPRINT;
if (fingerprint != null) {
result.append(fingerprint);
}
String serial = getDeviceSerialNumber();
if (serial != null) {
result.append(serial);
}
try {
return result.toString().getBytes("UTF-8");
} catch (UnsupportedEncodingException e) {
throw new RuntimeException("UTF-8 encoding not supported");
}
}
}

Wednesday, August 7, 2013

ActionBarCompat and I/O 2013 App Source

Posted by Chris Banes, Android Developer Relations


Following on the Android 4.3 and Nexus 7 announcements, we recently released two important tools to help you build beautiful apps that follow Android Design best practices:


  • We released a new backward-compatible Action Bar implementation called ActionBarCompat that's part of the Support Library r18. The ActionBarCompat APIs let you build the essential Action Bar design pattern into your app, with broad compatibility back to Android 2.1.


  • We released the full source code for the I/O 2013 app, which gives you working examples of ActionBarCompat, responsive design for phones and tablets, Google+ sign-in, synchronized data kept fresh through Google Cloud Messaging, livestreaming using the YouTube Android Player API, Google Maps API v2, and much more.
    All of the app code and resources are available for you to browse or download, and it's all licensed under Apache License 2.0/Creative Commons 3.0 BY so you can reuse it in your apps. You can get the source at code.google.com/p/iosched


This post helps you get started with ActionBarCompat, from setting up the Support Library to adding an Action Bar to your UI. If you want to see ActionBarCompat in action first, download the I/O 2013 app from Google Play and give it a try. The app's Action Bar is built using the ActionBarCompat and served as our main test environment for making sure the APIs work properly, with full compatibility across platform versions.


Getting Started with ActionBarCompat


ActionBarCompat is a new API in the Android Support Library that allows you to add an Action Bar to applications targeting minSdkVersion 7 or greater. The API and integration have been designed to closely mirror the existing framework APIs, giving you an easy migration path for your existing apps.


If you've already using another implementation of Action Bar in your app, you can choose whether to ActionBarCompat. If you�re using the old ActionBarCompat sample available through the SDK, then we highly recommend that you upgrade to the new ActionBarCompat API in the Support Library. If you�re using a third-party solution (such as ActionBarSherlock), there are a few reasons to consider upgrading:


ActionBarSherlock is a solid and well-tested library which has served
developers very well for a long time. If you are already using it and do not
currently require any of the above then there is no need to migrate.


If you are ready to get started with ActionBarCompat, the sections below take you through the process.


1. Add ActionBarCompat as a project dependency


ActionBarCompat is distributed as both a Gradle artifact and a library project. See Setting Up the Support Library for more information.


2. Update your style resources


The first thing to update are your Activity themes so they use a Theme.AppCompat theme. If you're currently using one of the Theme.Holo themes then just replace this with the related Theme.AppCompat theme. For instance if you have the following in your AndroidManifest.xml:


<activity
...
android:theme="@android:style/Theme.Holo" />


You would change it to:


<activity
...
android:theme="@style/Theme.AppCompat" />


Things get more tricky when you have a customized theme. The first thing to do is change your base theme to one of the Theme.AppCompat themes, like above.


If you have customized styles for the Action Bar (and related widgets) then you must also change these styles to extend from the Widget.AppCompat version. You also need to double-set each attribute: once in the Android namespace and again with no namespace (the default namespace).


For example, in the following example we have a custom theme which extends from Theme.Holo.Light, which references a custom Action Bar style.


<style name="Theme.Styled" parent="@android:style/Theme.Holo.Light">
<item name="android:actionBarStyle">@style/Widget.Styled.ActionBar</item>
</style>

<style name="Widget.Styled.ActionBar"
parent="@android:style/Widget.Holo.Light.ActionBar">
<item name="android:background">@drawable/ab_custom_solid_styled</item>
<item name="android:backgroundStacked"
>@drawable/ab_custom_stacked_solid_styled</item>
<item name="android:backgroundSplit"
>@drawable/ab_custom_bottom_solid_styled</item>
</style>


To make this work with AppCompat you would move the above styles into the values-v14 folder, modifying each style's parent to be an AppCompat version.


<style name="Theme.Styled" parent="@style/Theme.AppCompat.Light">
<!-- Setting values in the android namespace affects API levels 14+ -->
<item name="android:actionBarStyle">@style/Widget.Styled.ActionBar</item>
</style>

<style name="Widget.Styled.ActionBar" parent="@style/Widget.AppCompat.Light.ActionBar">
<!-- Setting values in the android namespace affects API levels 14+ -->
<item name="android:background">@drawable/ab_custom_solid_styled</item>
<item name="android:backgroundStacked"
>@drawable/ab_custom_stacked_solid_styled</item>
<item name="android:backgroundSplit"
>@drawable/ab_custom_bottom_solid_styled</item>
</style>


You would then need add the following into the values folder:


<style name="Theme.Styled" parent="@style/Theme.AppCompat.Light">
<!-- Setting values in the default namespace affects API levels 7-13 -->
<item name="actionBarStyle">@style/Widget.Styled.ActionBar</item>
</style>

<style name="Widget.Styled.ActionBar" parent="@style/Widget.AppCompat.Light.ActionBar">
<!-- Setting values in the default namespace affects API levels 7-13 -->
<item name="background">@drawable/ab_custom_solid_styled</item>
<item name="backgroundStacked">@drawable/ab_custom_stacked_solid_styled</item>
<item name="backgroundSplit">@drawable/ab_custom_bottom_solid_styled</item>
</style>


3. Modify Menu resources


As with the standard Action Bar in Android 3.0 and later versions, action items are added via the options menu. The difference with ActionBarCompat is that you need to modify your Menu resource files so that any action item attributes come from ActionBarCompat's XML namespace.


In the example below you can see that a new "yourapp" namespace has been added to the menu element, with the showAsAction and actionProviderClass attributes being provided from this namespace. You should also do this for the other action item attributes (actionLayout and actionViewClass) if you use them.


<menu xmlns:yourapp="http://schemas.android.com/apk/res-auto"
xmlns:android="http://schemas.android.com/apk/res/android">

<item
android:id="@+id/menu_share"
android:title="@string/menu_share"
yourapp:actionProviderClass="android.support.v7.widget.ShareActionProvider"
yourapp:showAsAction="always" />
...
</menu>


4. Extend Activity classes from ActionBarCompat


ActionBarCompat contains one Activity class which all of your Activity classes should extend: ActionBarActivity.


This class itself extends from FragmentActivity so you can continue to use Fragments in your application. There is not a ActionBarCompat Fragment class that you need to extend, so you should continue using android.support.v4.Fragment as the base class for your Fragments.


5. Add Menu callbacks


To display items on the Action Bar, you need to populate it by overriding onCreateOptionsMenu() and populating the Menu object. The best way to do this is by inflating a menu resource. If you need to call any MenuItem methods introduced in API level 11 or later, you need to call the shim for that method in MenuItemCompat instead. Here's an example:


@Override
public boolean onCreateOptionsMenu(Menu menu) {
// Inflate the menu
getMenuInflater().inflate(R.menu.main_menu, menu);

// Find the share item
MenuItem shareItem = menu.findItem(R.id.menu_share);

// Need to use MenuItemCompat to retrieve the Action Provider
mActionProvider = (ShareActionProvider)
MenuItemCompat.getActionProvider(shareItem);

return super.onCreateOptionsMenu(menu);
}


6. Retrieve the Action Bar


ActionBarCompat contains it�s own ActionBar class, and to retrieve the Action Bar attached to your activity you call getSupportActionBar(). The API exposed by the compatibility class mirrors that of the framework ActionBar class, allowing you to alter the navigation, show/hide it, and change how it display it�s contents.


7. Add ActionMode callbacks


To start an action mode from your ActionBarActivity simply call startSupportActionMode(), providing a callback similar to how you would with the native action mode. The following example shows how to start an action mode, inflate a menu resource and react to user�s selection:


startSupportActionMode(new ActionMode.Callback() {
@Override
public boolean onCreateActionMode(ActionMode actionMode, Menu menu) {
// Inflate our menu from a resource file
actionMode.getMenuInflater().inflate(R.menu.action_mode_main, menu);

// Return true so that the action mode is shown
return true;
}

@Override
public boolean onPrepareActionMode(ActionMode actionMode, Menu menu) {
// As we do not need to modify the menu before displayed, we return false.
return false;
}

@Override
public boolean onActionItemClicked(ActionMode actionMode, MenuItem menuItem) {
// Similar to menu handling in Activity.onOptionsItemSelected()
switch (menuItem.getItemId()) {
case R.id.menu_remove:
// Some remove functionality
return true;
}

return false;
}

@Override
public void onDestroyActionMode(ActionMode actionMode) {
// Allows you to be notified when the action mode is dismissed
}
});


Similar to the Activity class, ActionBarActivity provides two methods that you can override to be notified when an action mode is started/finished from within your Activity (including attached Fragments). The methods are onSupportActionModeStarted() and onSupportActionModeFinished().


8. Add support for Up navigation


Simple example


Up navigation support is built into ActionBarCompat and is similar to that provided in the Android framework in Android 4.1 and higher.


In the simplest form, you just need add a reference in each AndroidManifest <activity> element to its logical parent activity. This is done by adding a metadata element to the <activity> element. You should also set the android:parentActivityName attribute for explicit Android 4.1 support, although this is not strictly necessary for ActionBarCompat:


<activity android:name=".SampleActivity"
android:parentActivityName=".SampleParentActivity">
<meta-data android:name="android.support.PARENT_ACTIVITY"
android:value=".SampleParentActivity" />
</activity>


In your Activity you should then configure the home button to display for up navigation:


getSupportActionBar().setDisplayHomeAsUpEnabled(true);


When the user now clicks on the home item, the user will navigate up to the parent Activity set in your AndroidManifest.


Advanced calls


There are a number of methods which can be overridden to customize what happens when a user clicks on the home item. Each of the methods below replicate/proxy similarly-named methods added in Android 4.1:


  • onSupportNavigateUp()

  • supportNavigateUpTo(Intent)

  • getSupportParentActivityIntent()

  • supportShouldUpRecreateTask(Intent)

  • onCreateSupportNavigateUpTaskStack(TaskStackBuilder) and onPrepareSupportNavigateUpTaskStack(TaskStackBuilder)


Requesting Window features


When using ActionBarActivity you should call supportRequestWindowFeature() to request window features. For instance the following piece of code requests an overlay action bar:


@Override
protected void onCreate(Bundle savedInstanceState) {
super.onCreate(savedInstanceState);

// Needs to be called before setting the content view
supportRequestWindowFeature(Window.FEATURE_ACTION_BAR_OVERLAY);

// Now set the content view
setContentView(R.layout.activity_main);
...
}


Adding support for ProgressBar


Similar to the native Action Bar, ActionBarCompat supports displaying progress bars on the Action Bar. First you need to request the window feature, you then display or alter the progress bars with one of the following methods, each of which mirror functionality in the similar named method from Activity:


  • setSupportProgress()

  • setSupportProgressBarIndeterminate()

  • setSupportProgressBarVisibility()

  • setSupportProgressBarIndeterminateVisibility()


Below is an example which requests an indeterminate progress bar, and then later displays it:


@Override
protected void onCreate(Bundle savedInstanceState) {
super.onCreate(savedInstanceState);

// Needs to be called before setting the content view
supportRequestWindowFeature(Window.FEATURE_INDETERMINATE_PROGRESS);

// Now set the content view
setContentView(R.layout.activity_main);
...
// When ready, show the indeterminate progress bar
setSupportProgressBarIndeterminateVisibility(true);
}


Further Reading


The Action Bar API Guide covers a lot of what is in this post and much more. Even if you have used the Action Bar API in the past, it�s definitely worth reading to see how ActionBarCompat differs from the framework.


There are also a number of sample applications using ActionBarCompat covering how to use the library in various ways. You can find them in the �Samples for SDK� package in the SDK Manager.


Check out the video below for a quick hands-on with ActionBarCompat.


Monday, July 29, 2013

Unlocking More Users, with Tablets and Games

Posted by Purnima Kochikar, Director of Business Development, Games & Applications


Last week, we unveiled a number of new things in the world of Android. And while we already showcased the new tools available at your disposal in Android 4.3, we also unveiled a new Nexus 7 tablet, as well as the Google Play Games app, both of which represent opportunities to take advantage of a growing number of users.


Nexus 7 and the Android tablet revolution


If you�re a developer optimizing your app for Android tablets, no doubt you�re familiar with the original Nexus 7. It was Google�s statement on what a great Android tablet experience should look like, and since then, the Android tablet ecosystem has come a long way. There have already been more than 70 million activations of Android tablets, with more than 1 in 2 tablets sold today running Android. We�re starting to see with Android tablets what could be the hockey stick growth all of us experienced a couple of years ago with Android smartphones, and we hope that the new Nexus 7 continues to fuel this growth even further.


Most top developers on Android have already prepared their applications for this wave of new Android tablet users, including many of the essentials, like the New York Times, Zappos, Evernote, Flipboard, Pinterest and more. To help users find your tablet-designed apps more easily on Google Play, you can now choose to only see apps designed for tablets in the top lists. There are also over 50 new collections, which highlight outstanding tablet apps.


To take advantage of the Android tablet revolution, check out our Tablet App Quality Checklist, which has tips and techniques on how to deliver a great app experience for tablet users. It details all of the key things you need to do to optimize your app for tablets, like taking advantage of the extra screen real estate and adjusting font sizes and touch targets, to things you can do on the distribution side, like declaring support for tablet screens and showcasing your tablet UI on Google Play by uploading tablet-specific screenshots. Optimizing your app for Android tablets will unlock a whole new group of users, like those who are about to receive their new Nexus 7 tablets.


Taking your game to the next level


The Android games category on Google Play is on fire; in fact, the vast majority of top mobile game developers are building Android tablet games, and most new titles launch immediately on Android. To help game developers take advantage of the next generation of games, at Google I/O in May, we introduced Google Play game services, our gaming platform for Android, iOS, and the web. By building on Google�s strengths in mobile and cloud services, Google Play game services allows game developers to focus on what they�re good at: creating great gaming experiences for their users.


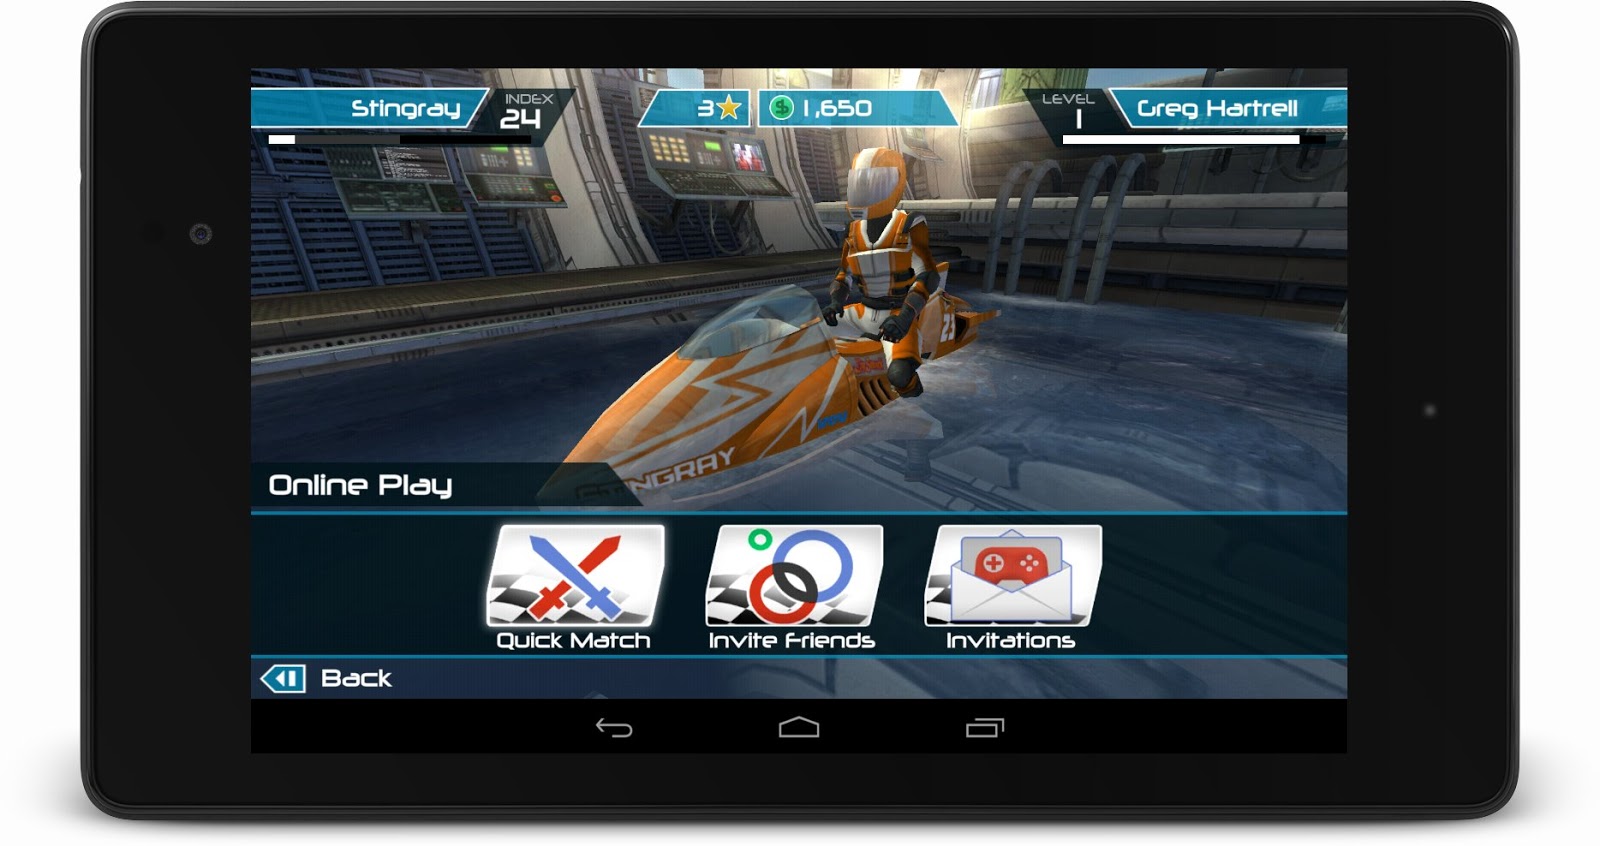
Turbocharging that growth even more, on Wednesday we introduced the Google Play Games app, which brings your friends together with the games you love, where you can invite a friend and start challenging gamers around the world, compete for top achievements, and race to the top of the leaderboard.


Since the launch at Google I/O, just over two months ago, over one thousand games have added Google Play game services, with millions of users enjoying features like leaderboards and multiplayer inside of the games they love. Some of those early developers using Google Play game services are reporting incredible upticks in vital engagement metrics; for instance, Concrete Software is seeing session length up 15%, and Glu is reporting a 40% increase in 7-day user retention.


Here are a few things you can do to take your game to the next level with Google Play:


  • Integrate with Play Games using achievements and leaderboards to activate your players.

  • Add real-time multiplayer to competitive and cooperative games and increase engagement.

  • Use Play Games branding guidelines and create rich visuals that bolster your presence in the Google Play Games app.


Whether it be getting your app ready for the wave of new Android tablets that are lighting up each day, or opening up a whole new set of features for your users with Google Play game services, a great Android experience starts with a great app or game. That�s why we�re working hard to help provide you with the tools and features needed to create those great experiences for your users, and to help you reach as many of them as possible in the process, with Google Play.


Wednesday, July 24, 2013

Android 4.3 and Updated Developer Tools

Posted by Dave Burke, Engineering Director, Android Platform


Today in San Francisco we announced Android 4.3, a sweeter version of Jelly Bean that includes great new features for users and developers. Android 4.3 powers the new Nexus 7 tablet that's coming soon to Google Play and retail outlets, and it�s rolling out now as an update to Nexus 4, Nexus 7, Nexus 10, and Galaxy Nexus HSPA+ devices across the world.


For developers, Android 4.3 includes the latest performance enhancements to keep your apps fast, smooth, and efficient, together with new APIs and capabilities to use in your apps. Here's a taste of what's new:


  • OpenGL ES 3.0 — Game developers can now take advantage of OpenGL ES 3.0 and EGL extensions as standard features of Android, with access from either framework or native APIs.

  • Bluetooth Smart — Now your apps can communicate with the many types of low-power Bluetooth Smart devices and sensors available today, to provide new features for fitness, medical, location, proximity, and more.

  • Restricted profiles — Tablet owners can create restricted profiles to limit access to apps, for family, friends, kiosks, and more. Your app can offer various types of restrictions to let tablet owners control its capabilities in each profile.

  • New media capabilities — A modular DRM framework enables media application developers to more easily integrate DRM into their own streaming protocols such as MPEG DASH. Apps can also access a built-in VP8 encoder from framework or native APIs for high-quality video capture.

  • Notification access — Your apps can now access and interact with the stream of status bar notifications as they are posted. You can display them in any way you want, including routing them to nearby Bluetooth devices, and you can update and dismiss notifications as needed.

  • Improved profiling tools — New tags in the Systrace tool and on-screen GPU profiling give you new ways to build great performance into your app.


Check out the Android 4.3 platform highlights for a complete overview of what�s new for developers. To read more about the new APIs and how to use them, take a look at the API Overview or watch the new DevBytes videos.


Along with the new Android 4.3 platform we�re releasing an update to the Android NDK (r9). The new NDK gives you native access to the OpenGL ES 3.0 APIs and other stable APIs in Android 4.3, so if you use high-performance graphics in your games or apps, make sure to check it out.


Last, we�ve updated the Android Support Library (r18) with several key APIs to help you build great apps with broad compatibility. Most important, we've added an Action Bar API to let you build this essential Android design pattern into your app with compatibility back to Android 2.1. For apps targeting RTL languages, there's a new BidiFormatter utility you can use to manage RTL strings with compatibility back to Android 2.1. Also, watch for a new RenderScript feature coming soon that will let you take advantage of hardware-accelerated computation with compatibility back to Android 2.2.


You can get started developing and testing on Android 4.3 right away, in Android Studio or in ADT/Ant. You can download the Android 4.3 Platform (API level 18), as well as the SDK Tools, Platform Tools, and Support Library from the Android SDK Manager.

Friday, July 19, 2013

Making Beautiful Android App Icons

Posted by Roman Nurik, Android Developer Relations


For most users, the launcher icon (sometimes referred to as the app icon) is the first impression of your app. As higher density screens on both phones and tablets gain popularity, it's important to make sure your launcher icon is crisp and high quality. To do this, make sure you�re including XHDPI (320dpi) and XXHDPI (480dpi) versions of the icon in your app.

In addition to the current launcher icon guidelines, please also refer to these additional important guidelines when creating your icons:

  • Launcher icons are 48dp square and should be provided for MDPI, HDPI, XHDPI, and XXHDPI densities—at the very least XHDPI and XXHDPI.

  • The 512px Google Play listing icon should have the same content as the launcher icon, except for minor additional badging.

  • Launcher icons should be designed specifically for Android. As per the Pure Android design guidelines, avoid mimicking visual elements and styles from other platforms.

  • Launcher icons should be three-dimensional, front view, with a slight perspective as if viewed from above, so that users perceive some depth.

  • Launcher icons should have a distinct silhouette, meaning that you should avoid simple square/circle icons and instead opt for unique shapes.

  • Launcher icons should be simple at the macro level but still detailed at the micro level (e.g. include subtle edge effects, gradients and textures).

  • Launcher icons should employ lightweight background protection such as a subtle drop shadow, but it should not be too dark or visually prominent.

  • Launcher icons should include between 0dp and 3dp of padding. Vary the padding for optical alignment and weight normalization purposes (e.g. thinner icons can use smaller padding and thicker icons can use less padding for a more consistent icon mass across icons).

Note that tablets and other large screen devices request a launcher icon that is one density size larger than the device's actual density, so you should provide your launcher icon at the highest density possible. For example, if a tablet has an XHDPI screen, it will request the XXHDPI version of the launcher icon.

Tuesday, July 9, 2013

Mid Year 2013 Android Developer Survey

Posted by Reto Meier, Android Developer Relations Tech Lead


The 2013 mid-year Android Developer Survey is now open!


Last year more than 5,000 of you shared your Android Development experiences and challenges with us, and your responses directly influenced our choices and priorities for building things like Android Studio, the new Google Play Publishing Console, and the Google Play services.


We in the Android Developer Relations team are passionate about making Android app development a great experience, so we're once again asking all of you involved in developing Android apps - engineers, designers, product managers, and distribution and support folks - to let us know what you think.


We want to better understand the challenges you face when planning, designing, writing, distributing, and monetizing your Android apps, so we've put together this brief (15-20min) survey that will help us create better tools and resources for you.


In an effort to get a better representation of developers from around the world the survey is available in the following languages:


Last year you told us you'd like a way to give us general written feedback, so to facilitate this while keeping the survey short and simple, we've included a link at the end of the survey that will let you send us as much direct feedback as you care to, completely anonymously.


Of course, you can always send us your thoughts, questions, suggestions, and complaints any time by posting to us (publicly or privately) on Google+ at +Android Developers or using the hash tag #AndroidDev.


As always, we're looking forward to hearing your thoughts!

Wednesday, July 3, 2013

The Beautiful Design Summer 2013 Collection on Google Play

Posted by Marco Paglia, Android Design Team

Attention to detail makes an app truly beautiful: transitions are fast and clear, layout and typography are crisp and meaningful, and design touches that delight you in surprising ways are sprinkled throughout. Today, we�re publishing a new Beautiful Design collection on Google Play, which highlights 11 beautiful apps with these kinds of masterfully crafted design details.

The collection, which we�ll refresh with new apps every so often, currently includes:

  • Pattrn (by Lucas Rocha), a beautifully focused app for discovering and sharing unique wallpapers on any size screen device.

  • Pocket (by Read It Later), an article keeper and reader app with a beautiful queue browsing interface and a remarkably comfortable and pleasing reading experience on phones and tablets.

  • Timer (by Opoloo), a timer app with an elegant and deeply satisfying timer-creation interface and simple, beautiful theme choices.

  • Eye in Sky Weather, NY Times, Grand St., Pinterest, Press, Expedia, Flipboard and TED… each with delightful design details.

If you�re an Android developer, make sure to play with some of these apps to get a sense for the types of design details that can separate good apps from great ones.

Lastly, remember that this new Beautiful Design collection is just one of a number of unique collections on Google Play that are front and center in the new Google Play Store app client.